Quick Start
This Quick Start guide shows how to import Mail Manager content:
Locate and run the Bulk Uploader
The Bulk Uploader is distributed via an MSI installer. Once installed, it will typically be accessible via an icon like this on your desktop.

When you open the Bulk Uploader the Import source will default to Mail Manager Collection files and the Root folder will be C:\
So the first thing to do is use the Browse button to navigate to a folder containing Collection files.
Collection files are shown in the left-hand list and when you select a collection from the list, the right-hand list will display the locations contained in that collection file.
In the example below, the selected collection has 19 locations and the MSG Qty column shows the number of emails in each one.

Your first import
- Check the box next to the first collection file that you would like to import; you can check multiples but for your first run it's best to just select one.
- Enter your Tenant Key in the Tenant Key: field. Your key can be found on the customer portal and on your Account Administration tab
- Pick the Import Emails button
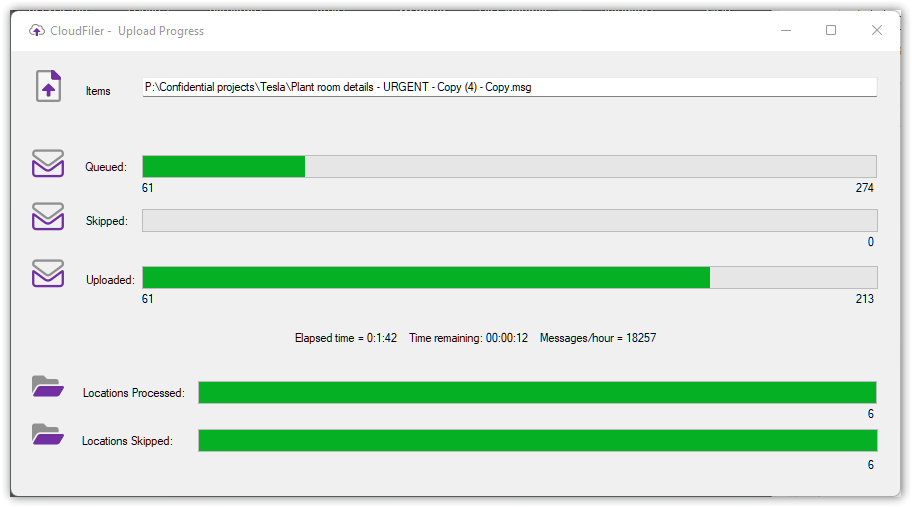
You will see a progress dialogue similar to this one.

Things to note:
- The Elapsed time, Time remaining and Messages/hour can be useful if you have a large number of emails to process and need to first run some smaller test imports to get a feel for how long the whole process will take.
- The Bulk Uploader maintains a log of which locations it has already created and which emails it has already uploaded and will skip any that it has already processed. In the example above it skipped the 6 locations because it already had them
- If it has to skip any emails it will create a log file with the details of each one and it will automatically open the file at the end of the upload process so that you can check what went wrong
- The last column shows the number of emails uploaded which can be useful both when an upload encounters issues, but also when you re-run the upload on the same locations some days later, as you can firstly see: where new emails have been filed, how many have been uploaded, and how much more there is to do. In the example below, a new email has been filed to the Volkwagen filing location since the last time the uploader was run

Do it again
- Pick the Import Emails button again
Don't worry, you can't do any harm and you won't get two copies of everything.
Notice how this second run is much quicker because it has skipped creating locations and importing emails which it has already processed.

That's pretty much it
However we would recommend that you familiarise yourself with the following topic areas
