Create/Update via XLSX
The XLSX method provides the ability to make the following changes to CloudFiler via a spreadsheet:
- Create locations
- Delete locations
- Edit location names or paths
- Upload emails

Creating locations
To create locations via a spreadsheet first create a simple spreadsheet in Excel with two columns where the first column lists the names of the locations and the second one lists their paths as in this example:
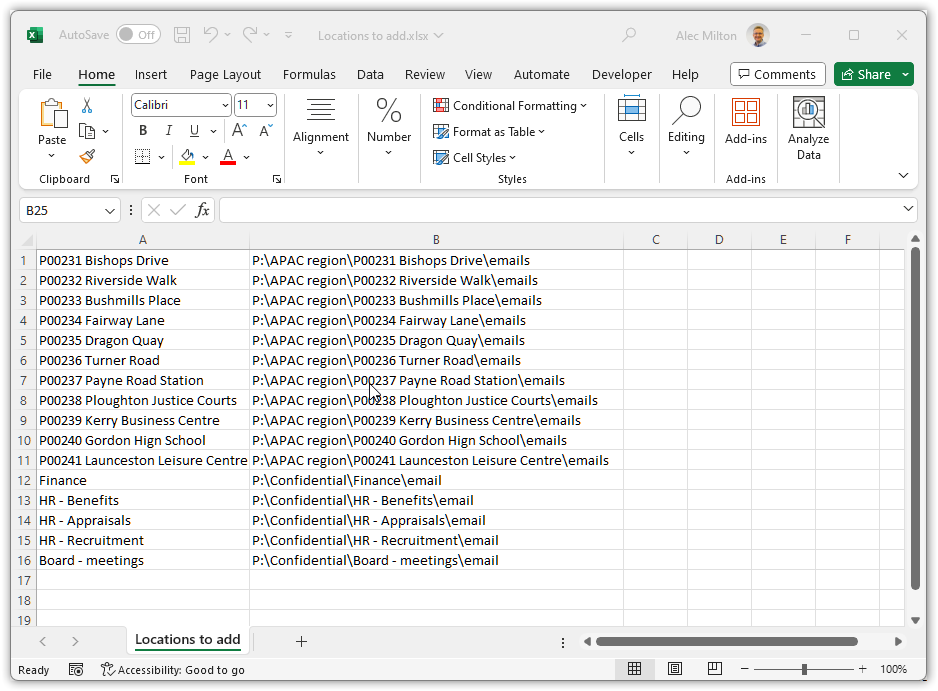
Save the file.
In the Bulk Uploader use the Browse button to select the folder that contains your XLSX file, change the Import source to Create/Update via XLSX, then select the file from the list. This will update the details in the right-hand panel to show the contents of the spreadsheet. Check the Locations you wish to process, then click the Create/Update Locations button.
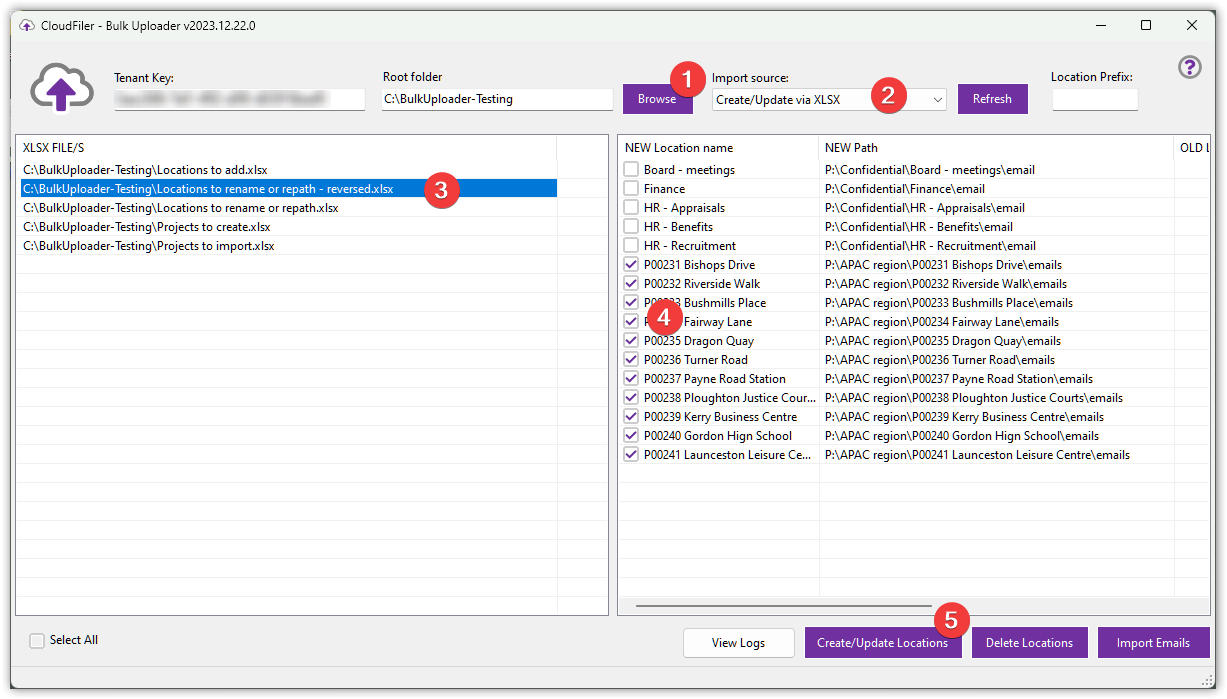
The locations will be created if they don't already exist. If you have already created any of the locations via the Bulk Uploader it will skip them and show the details in the progress view.

Deleting locations
To delete locations via a spreadsheet first create a simple spreadsheet in Excel with two columns where the first column lists the names of the locations and the second one lists their paths as in this example:
Save the file.
In the Bulk Uploader use the Browse button to select the folder that contains your XLSX file, change the Import source to Create/Update via XLSX, then select the file from the list. This will update the details in the right-hand panel to show the contents of the spreadsheet. Check the Locations that you wish to delete, then click the Delete Locations button.

If the locations exist they will be deleted from CloudFiler.


Editing the location names or the paths of existing locations
To edit locations via a spreadsheet first create a simple spreadsheet in Excel with four columns where the first two columns are the new names and paths and the last two are the old location names and paths as in this example:
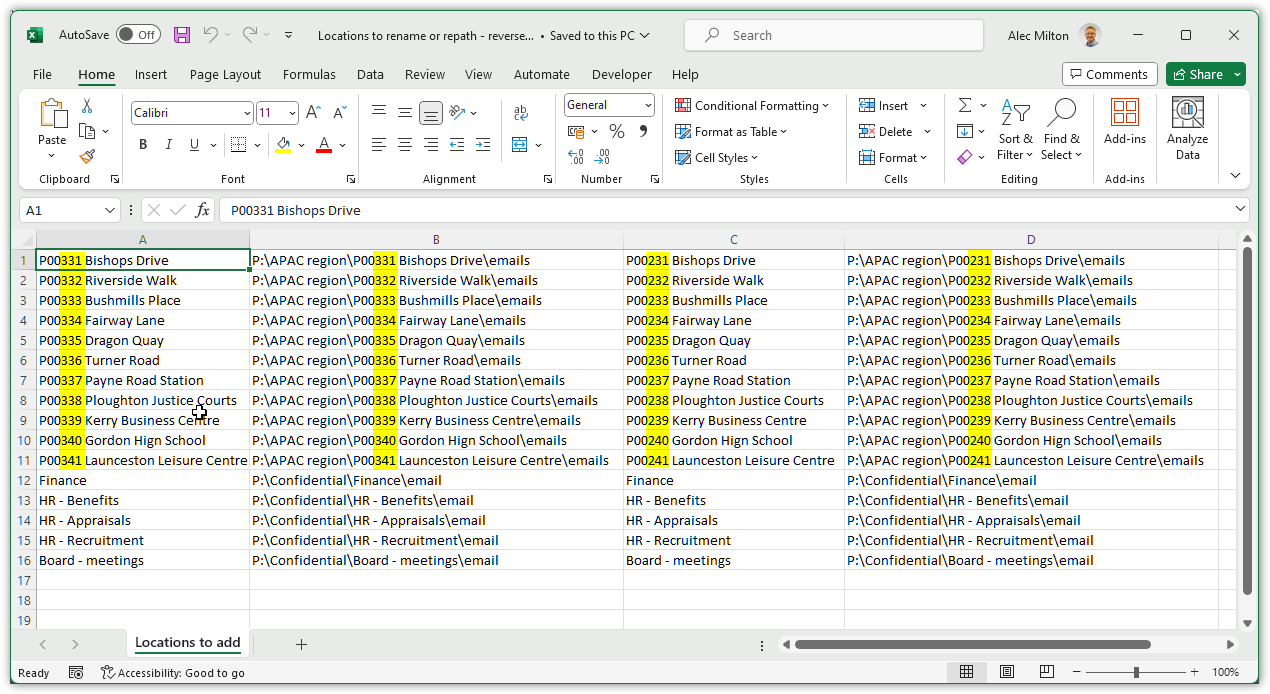
In this example we want to change both the names of the locations and their paths, you can however just change one and not the other.
Notice that the last 5 locations are unchanged. The Bulk Uploader will skip these.
Save the file.
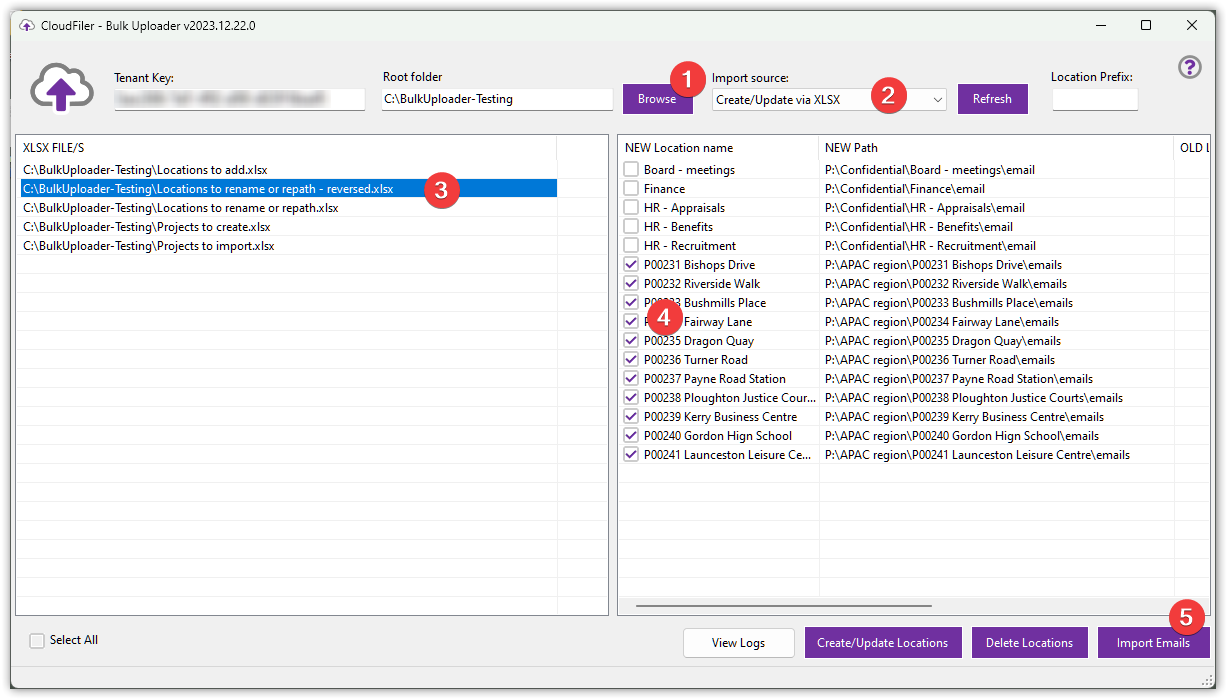
In the Bulk Uploader use the Browse button to select the folder that contains your XLSX file, change the Import source to Create/Update via XLSX, then select the file from the list. This will update the details in the right-hand panel to show the contents of the spreadsheet. Check the Locations that you wish to process, then click the Create/Update Locations button.
If your spreadsheet has four columns, the Bulk Uploader will assume that the first two columns contain the new location names and paths, whereas the last two contain the old names and paths.

The Bulk Uploader will update the locations that have changed and skip any that haven't.
Upload emails
To upload emails via a spreadsheet first create a simple spreadsheet in Excel with two columns where the first column lists the names of the locations and the second one lists their paths as in this example:
Save the file.
Using Windows Powershell to create the spreadsheet for you
Whilst you could manually add all the folders to your XLSX file, this script will make it quicker and easier. You just provide a list of folders to examine and it will find all the sub-folders that contain either .MGS or .EML files and will add them to a CSV. It is provided as three files:
- A sample folders.txt which you can edit to list the root folders that you want to scan
- ExportMsgFolder.ps1 which is the PowerShell script
- CreateCSV.bat which is a batch file that launches the PowerShell for you
The files are provided in this zip: CreateCSVs.zip
All you need to do is edit the folders.txt, save it and then double-click the CreateCSV.bat to run the script.
It will create one CSV file for each folder that you have listed and will name it using the last folder name in the path.
Be sure to convert these to XLSX by opening them in Excel and then saving as XLSX.
You now have a spreadsheet of paths which you can edit to create the two columns as described above.
When you are ready, you can then import the locations.
In the Bulk Uploader use the Browse button to select the folder that contains your XLSX file, change the Import source to Create/Update via XLSX, then select the file from the list. This will update the details in the right-hand panel to show the contents of the spreadsheet. Check the Locations that you wish to import, then click the Import Emails button.
The Bulk Uploader will create the locations if they don't already exist and will upload any MSG files it finds at the location's path. If a path is not accessible it will be listed in a failures report that will be displayed once the batch has finished.
The tool maintains a record of the locations and emails it has already uploaded, so if you need to correct some paths you can safely re-run the whole batch as it will skip those that have already been processed.